¡El marcador de todos los marcadores!

Si bien Find the Markers puede parecer una experiencia más del estilo de búsqueda del tesoro, en realidad ofrece un mapa bastante intrincado, con más de un puñado de secretos desafiantes para encontrar. Dentro de la Dimensión de dificultad hay cinco marcadores para que los jugadores los descubran, incluido el que cubriremos en esta breve guía, el Marcador de tabla de dificultad .
Encontrar el marcador de tabla de dificultad en Find the Markers
Una vez que haya aparecido en Find the Markers, diríjase hacia el área del bosque del mapa y acérquese a su gran montaña.
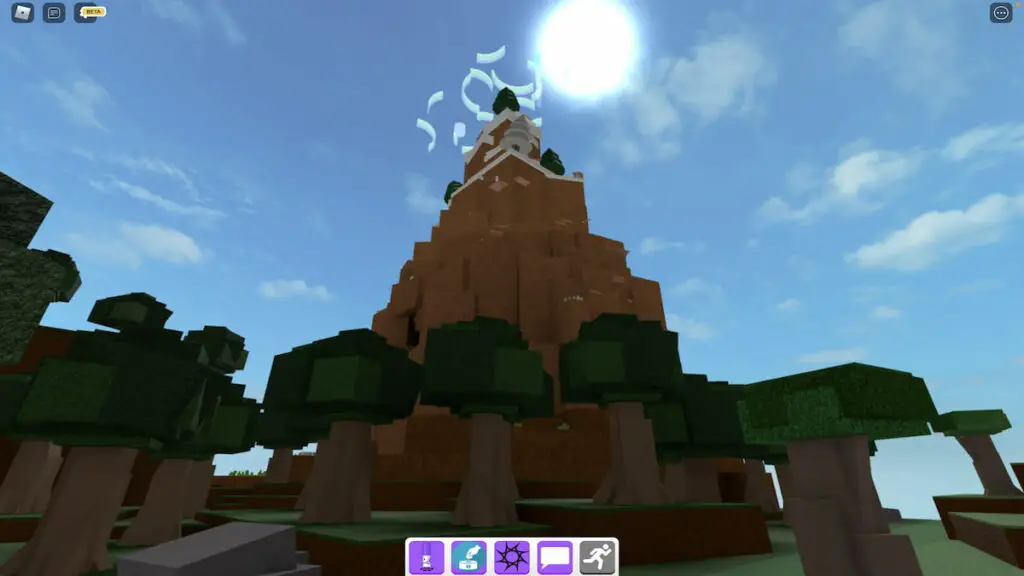
Al pie de esta montaña hay una escalera de madera improvisada: súbela y entra en la cueva a la que conduce.

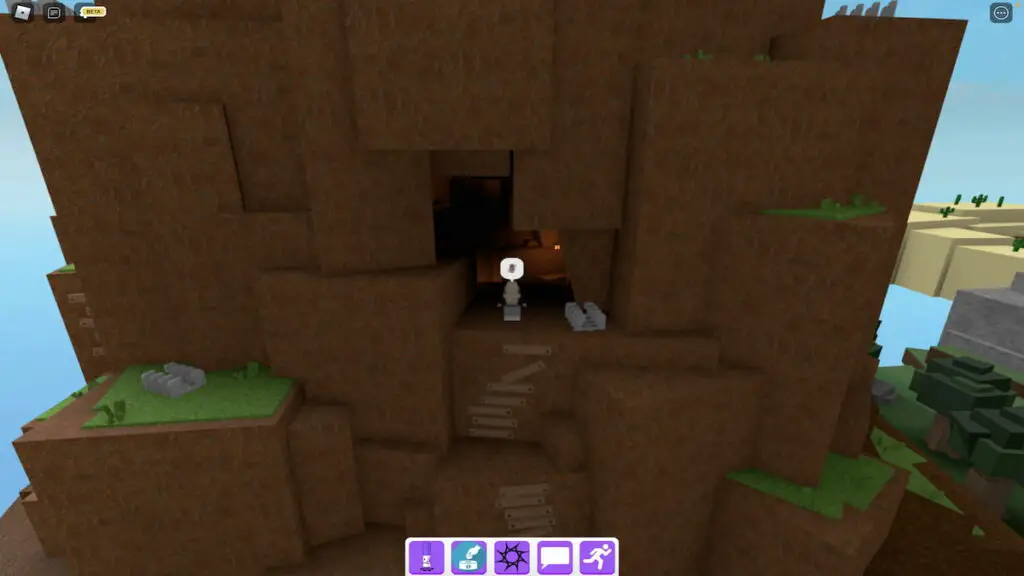
Al entrar en esta cueva, deberías notar un túnel oscuro con dos linternas al comienzo.
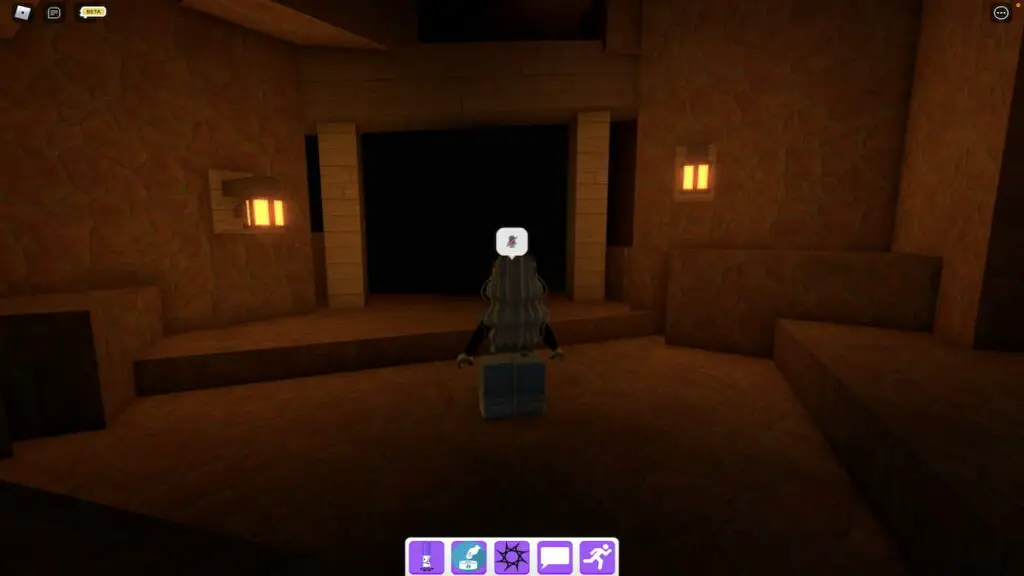
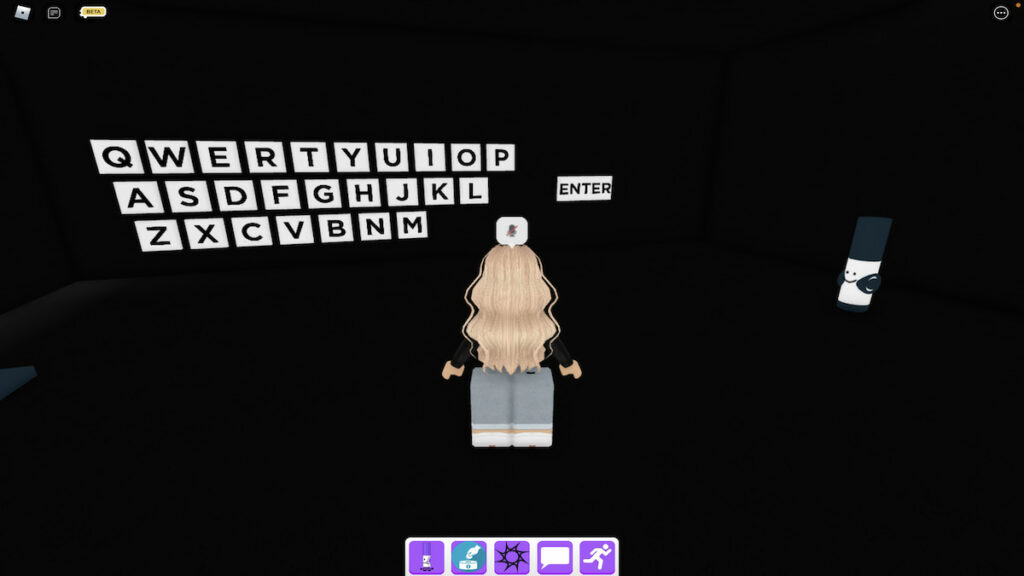
Al ingresar a este túnel, ingresará a una habitación secreta que presenta una pared de letras. Para continuar hacia el marcador Killbrick, haga clic en las letras D, I, F, F, I, C, U, L, T e Y, en ese orden, para deletrear el mundo DIFICULTAD y luego haga clic en el botón Entrar . Si ingresó el código correctamente, será teletransportado automáticamente a la Dimensión de dificultad .
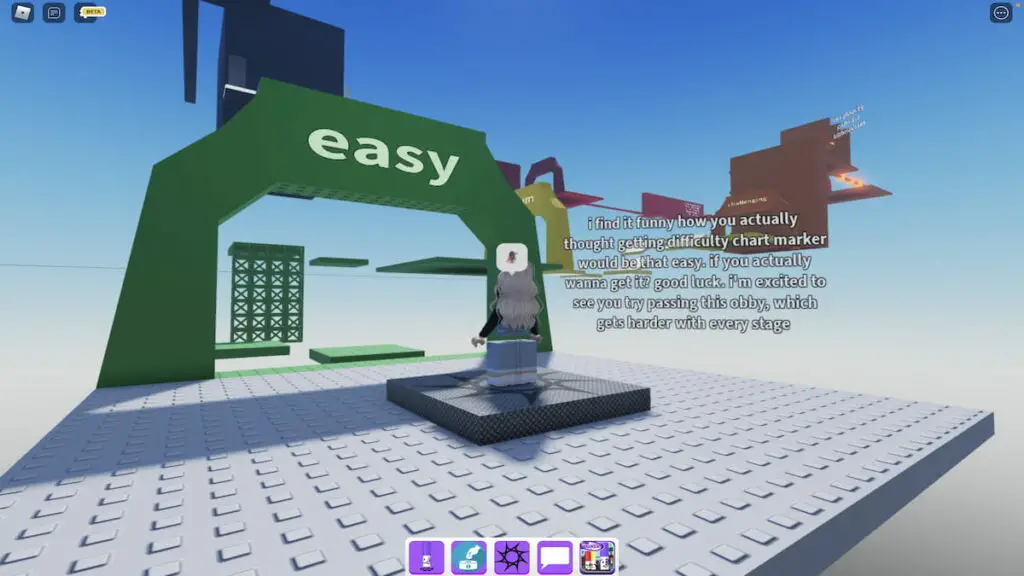
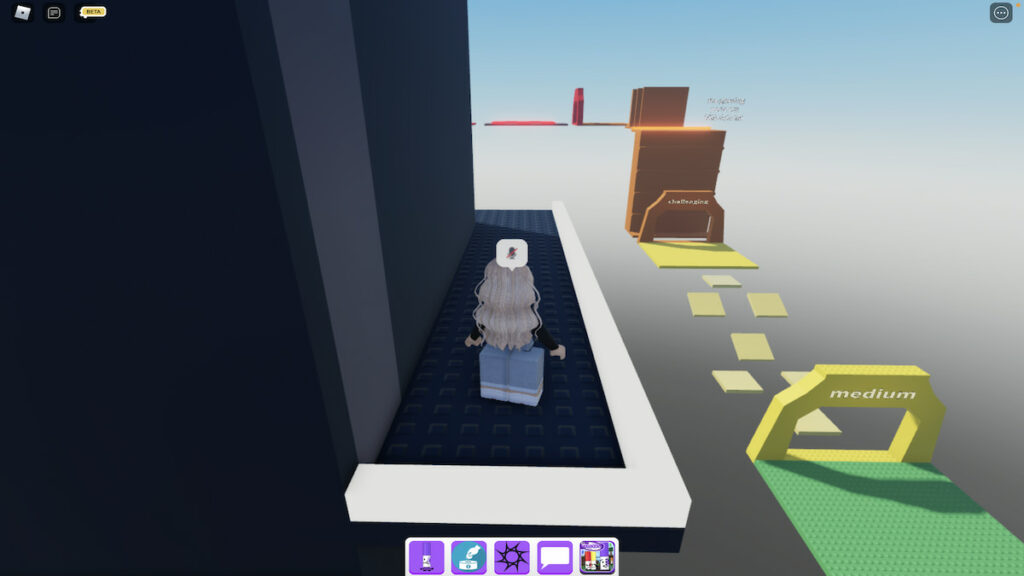
Para obtener el marcador de tabla de dificultad, los jugadores deberán completar la totalidad del obby de la dimensión de dificultad. Hay ocho niveles en este obby, fácil , medio , desafiante , duro , difícil , loco , aterrador y MARKEROUS , y cada uno varía en duración y dificultad. Los primeros niveles son bastante simples, siendo terroríficos y MARCADOROS los más difíciles de todos. Para comenzar tu viaje de completar este obby, camina y salta a través del nivel fácil para llegar al medio .
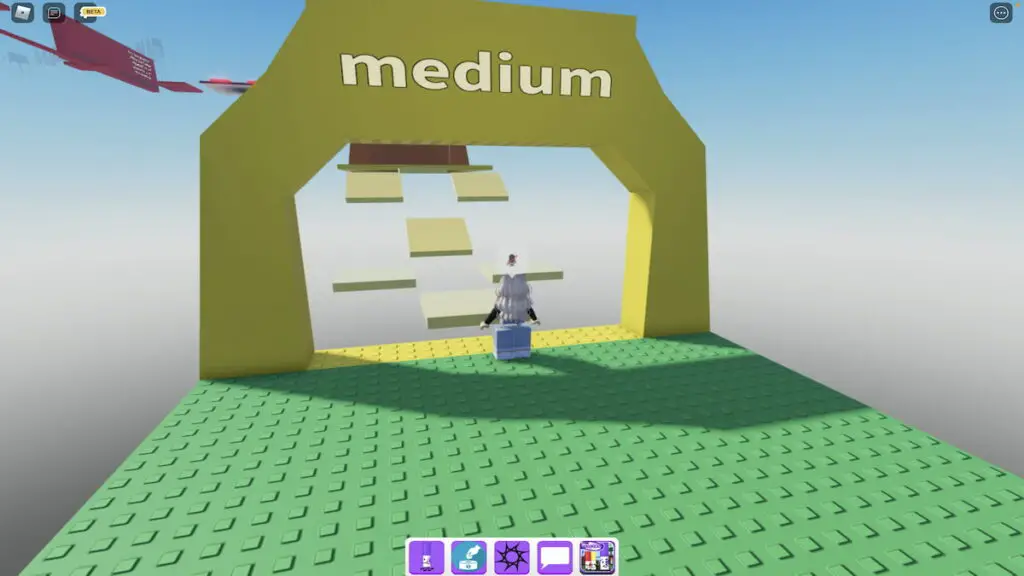
Para sobrevivir en el medio , deberás saltar a través de un conjunto de mosaicos resbaladizos y llegar a la plataforma de arriba. Si te resbalas y mueres al caer, volverás a empezar al principio del nivel fácil , ¡así que ten cuidado! Una vez que haya llegado al comienzo del nivel desafiante , salte a través del pequeño espacio y suba a la primera repisa frente a usted.
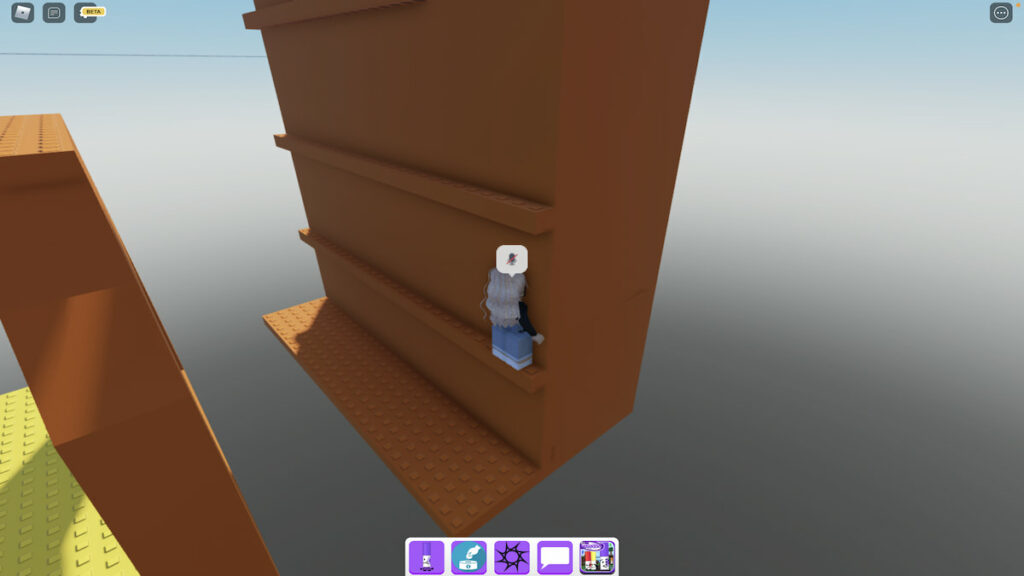
Ahora, salta y sube desde esta repisa para llegar a la siguiente y repite esta estrategia hasta que estés en la parte superior de la pared.
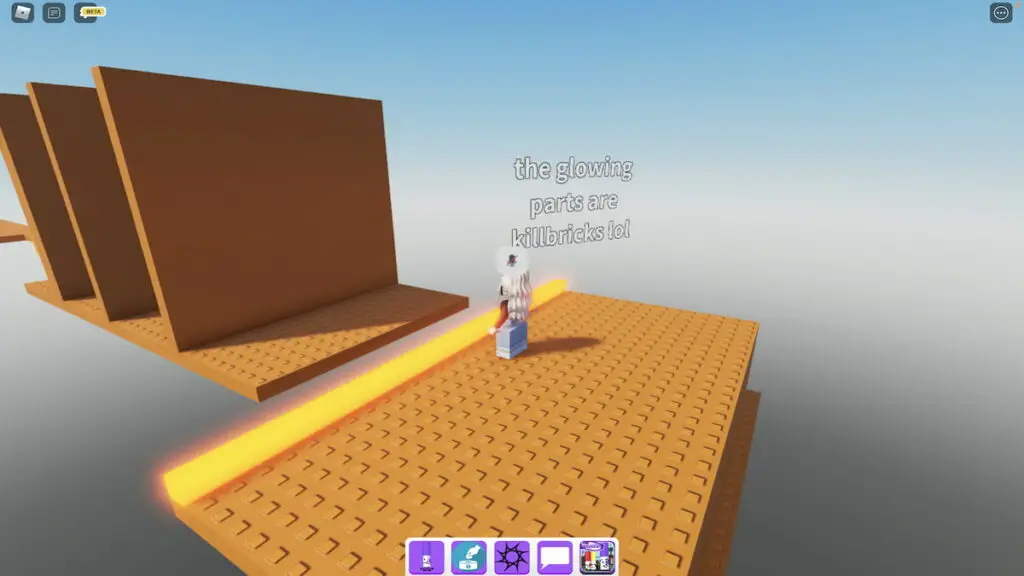
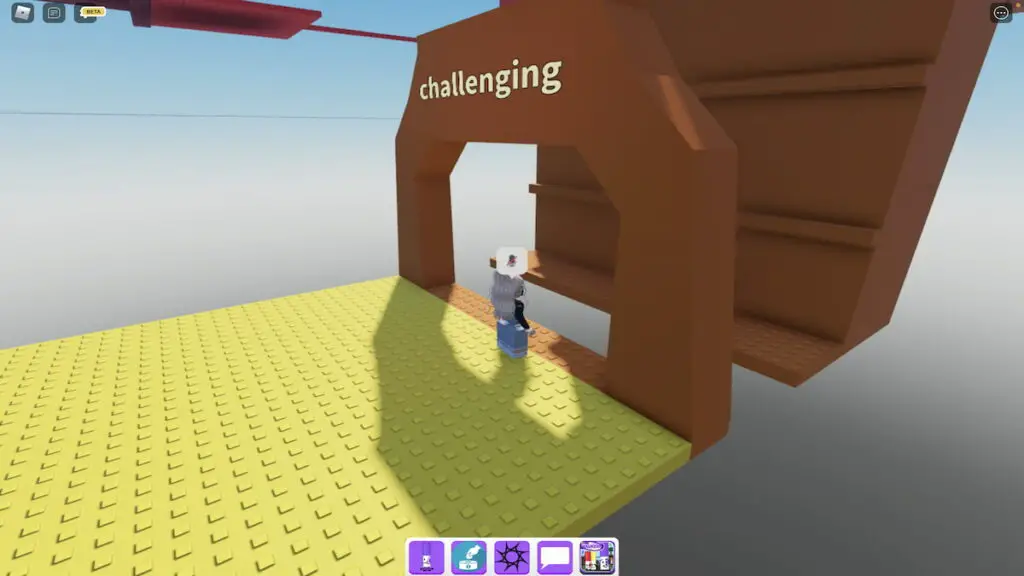
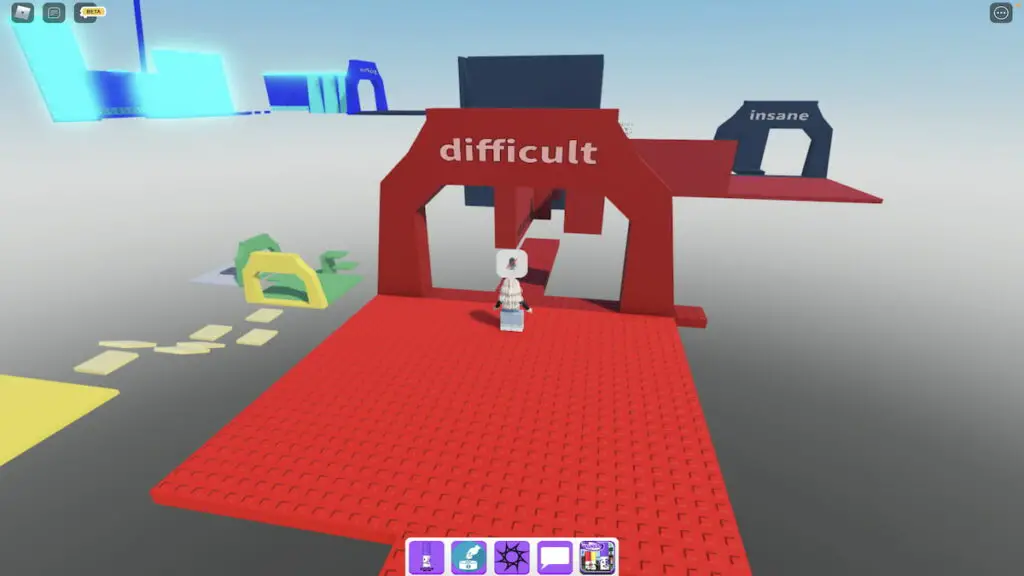
Desde aquí, salta sobre el killbrick resplandeciente, fuera y alrededor de las pequeñas paredes, y hasta el comienzo del nivel difícil .

Similar to the medium level, the hard level uses a slick base for its first obstacle, making it hard to avoid the glowing killbrick squares as you attempt to jump between them. To complete this obstacle easily, we’d recommend running and jumping through it in one quick motion rather than trying to jump and stop repeatedly. If you can pick up a solid momentum, you should be able to run and jump between the squares without hitting any of them.
Once you reach the end of the first obstacle, you’ll immediately be faced with the second, which requires you to jump and latch onto a horizontal ladder and slide your way to a small platform on your left. Though the experience says otherwise, using shift lock isn’t required—if you find that just turning your camera and moving to the left is easier than using shift lock, that can totally work too.
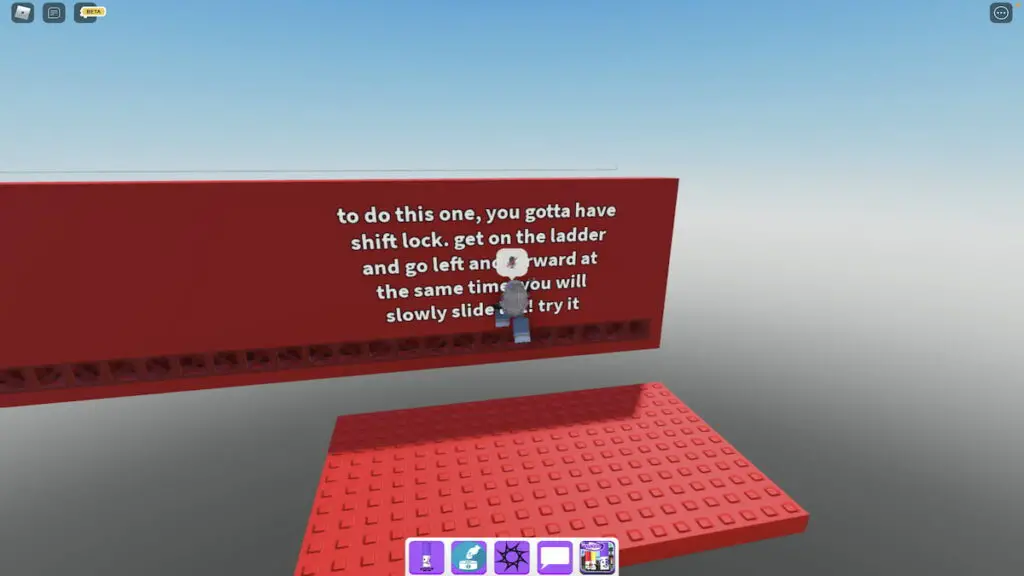
To reach this small platform, either climb down the ladder using the downward movement key or press the Spacebar to jump off. Then, simply walk across the thin bridge to reach the entrance to the difficult level.
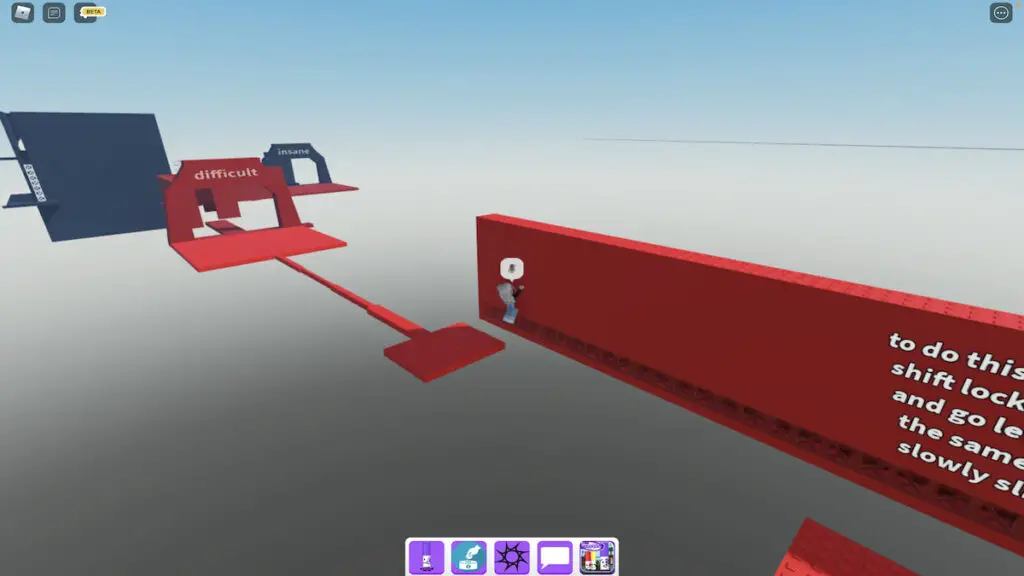
This level uses the same type of obstacle as hard, the horizontal ladder, but takes it up a notch by making players jump across a large gap from one ladder to another. Again, if shift lock is easier for you, turn it on, but if not, feel free to leave it off. Just be sure to move at your own pace!

Related: How to get Dark Markery in Roblox Find the Markers
Once you’ve cleared the ladder obstacle, you’re basically at the end of the difficult level—all that’s left to do is jump over a few killbricks. After jumping over the third killbrick, you should be in front of the insane level entrance.
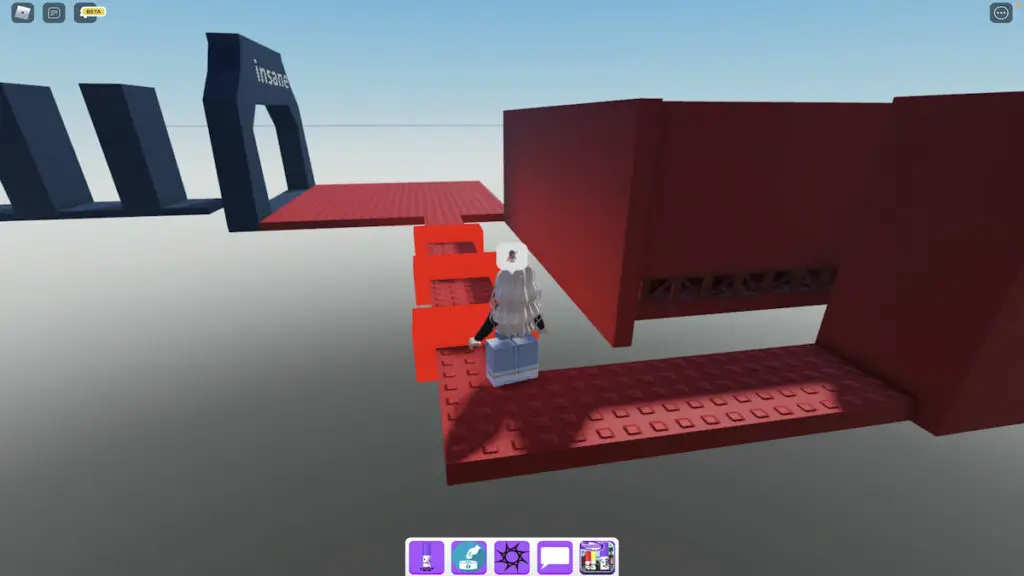
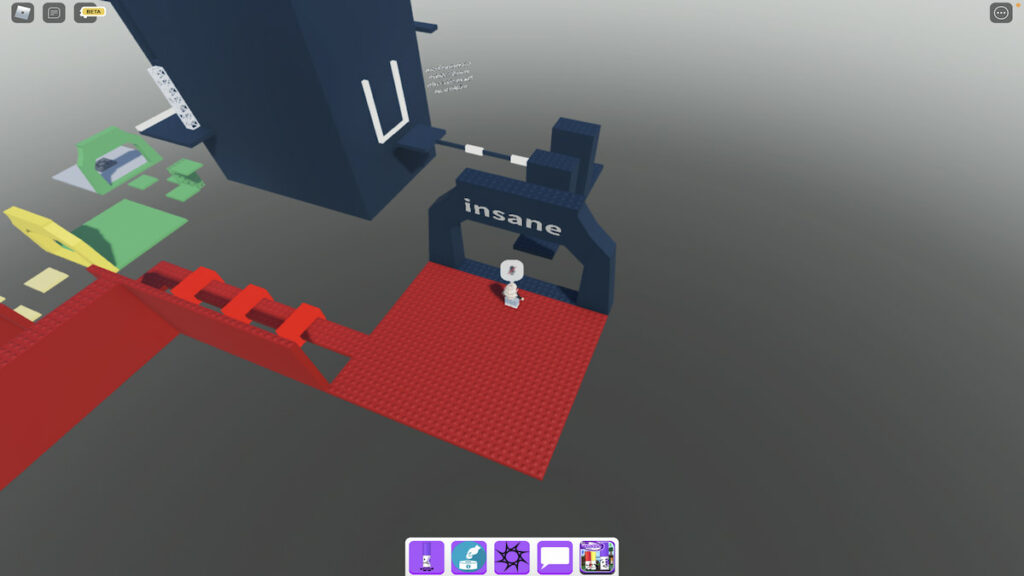
As seen from the image above, the insane level is mostly contained inside of a building rather than spread out across various platforms. To reach this building, you’ll need to jump around two obstacle walls, over two thin killbricks, and then through the building’s transparent entrance.
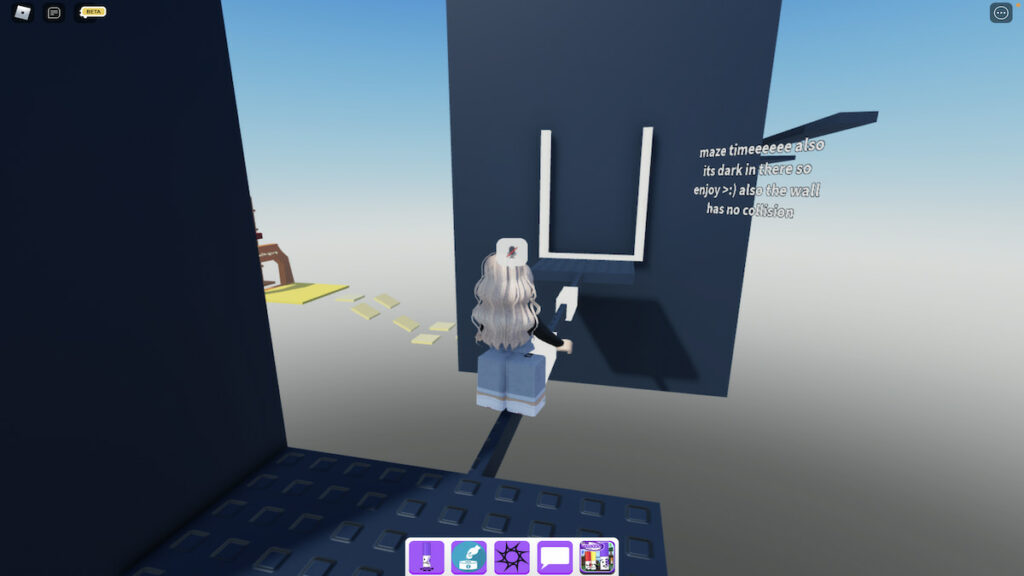
Inside of this building is an exceptionally dark maze that can lead you to two different exits, one that leads you to the rest of the standard obstacle course and another that teleports you to the Danger Marker’s obstacle course. In the images below, we’ll show you the path you need to take to continue along the standard course and reach Difficulty Chart Marker. To help you see the path better, we’ve increased the brightness on these images—it’s nowhere near this bright inside of the maze!
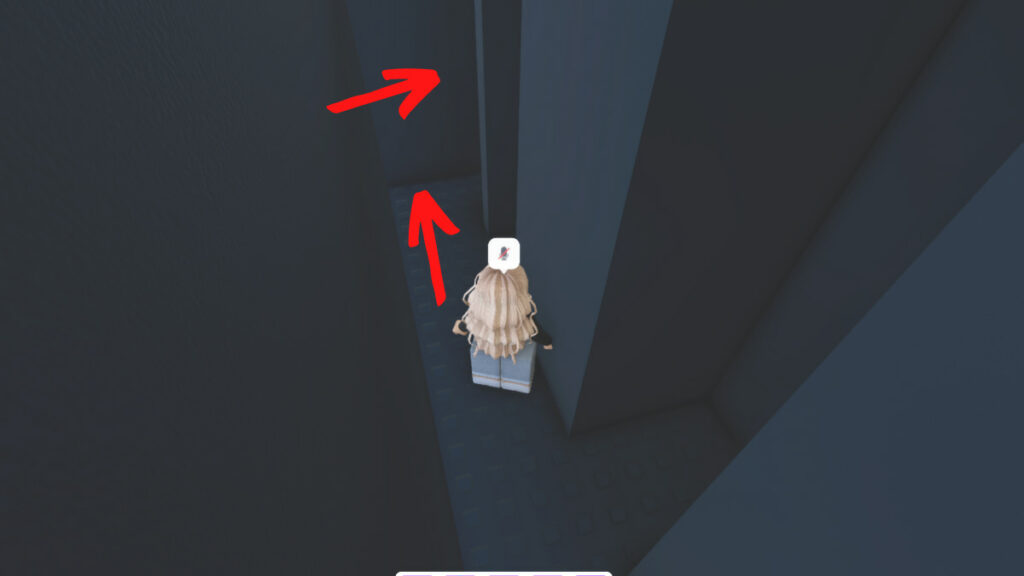
As soon as you hop through the transparent entrance, turn left and walk straight until you run into a wall. At this wall, turn right.
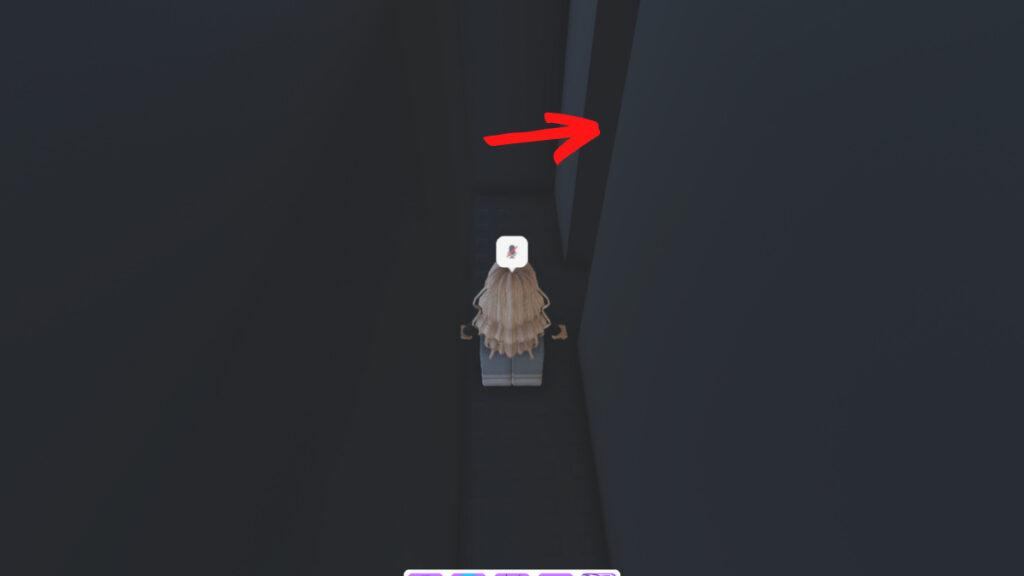
Continue straight and then turn right before running into the next wall.
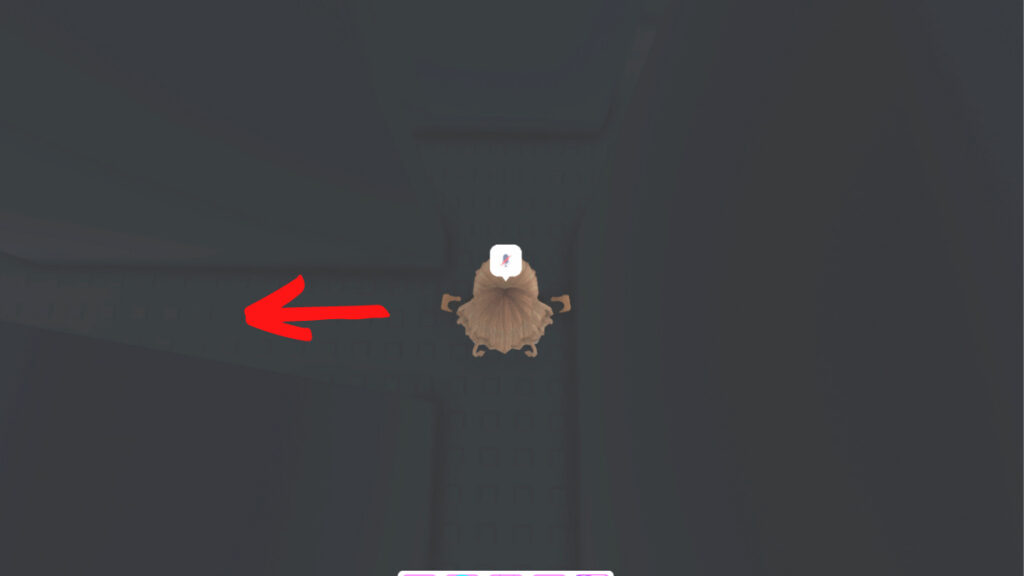
Now, walk straight again until you reach the first turn on your left. Take this turn and continue forward.
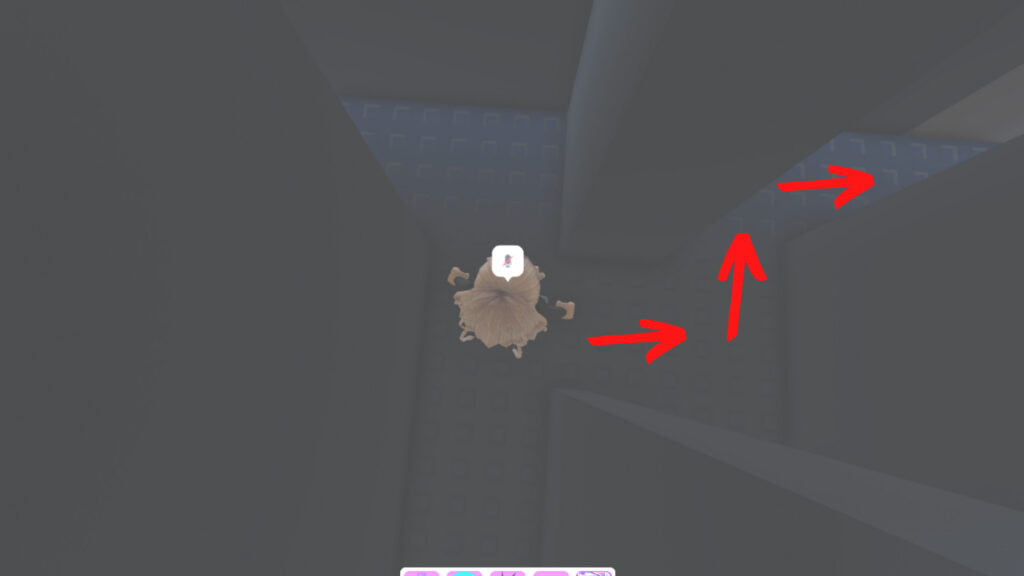
After a few steps, you should see a turn on your right—take this turn, then immediately turn left, and follow the path to the right.
At the end of this path should be a transparent part of the wall that you can walk through—this section will be lighter in color when compared to the rest of the wall and will lead you outside of the maze.
Now that you’re outside the maze, walk to the end of the platform and turn left—around the corner will be a white ladder. Climb this ladder and squeeze through the small opening to reach the next obstacle at the insane level.
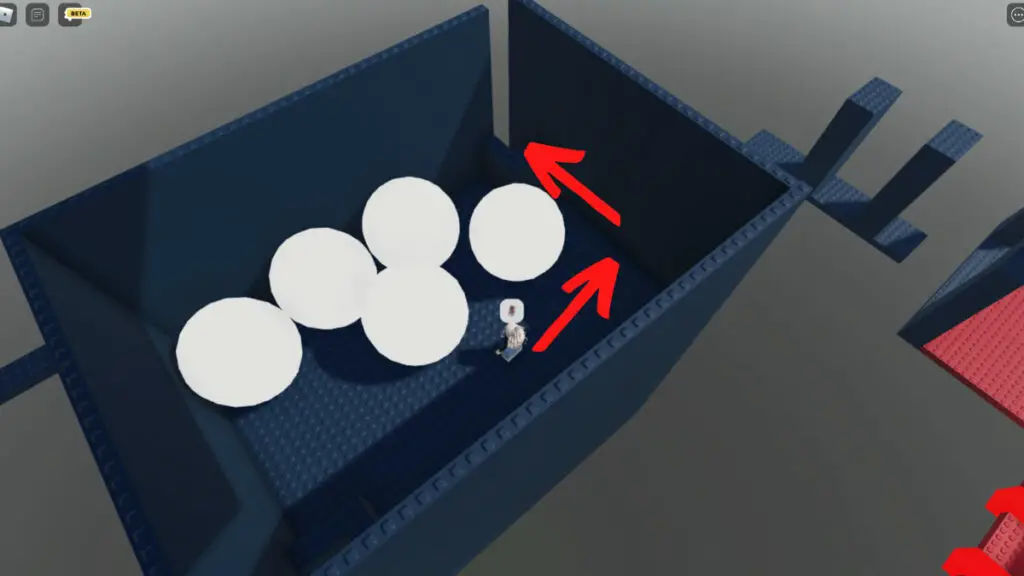
This next section of the insane level is super easy to beat, simply follow the path we’ve outlined below to avoid the killbrick balls and leave the obstacle. Then, walk forward along the thin platform to reach the terrifying level’s entrance.
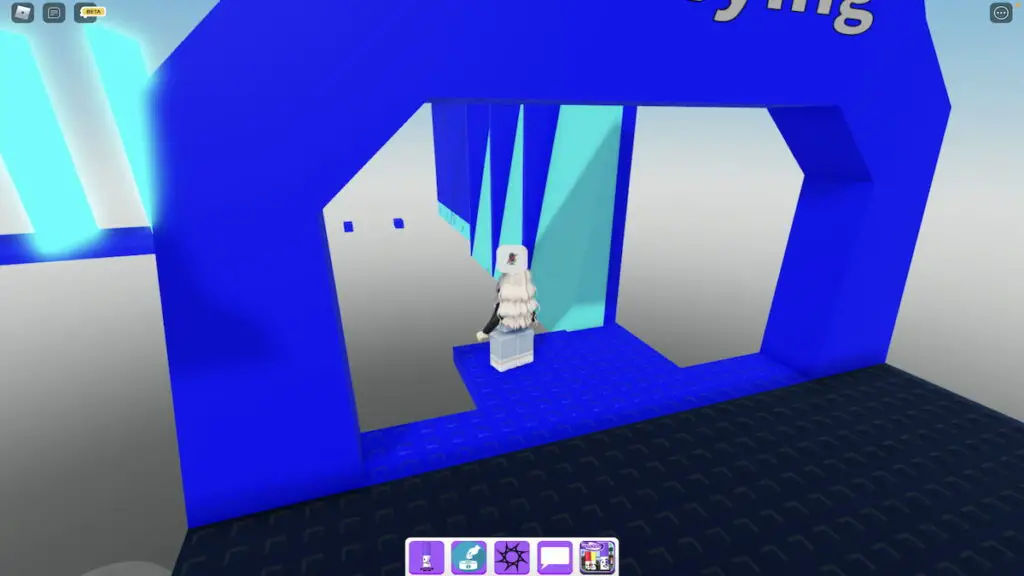
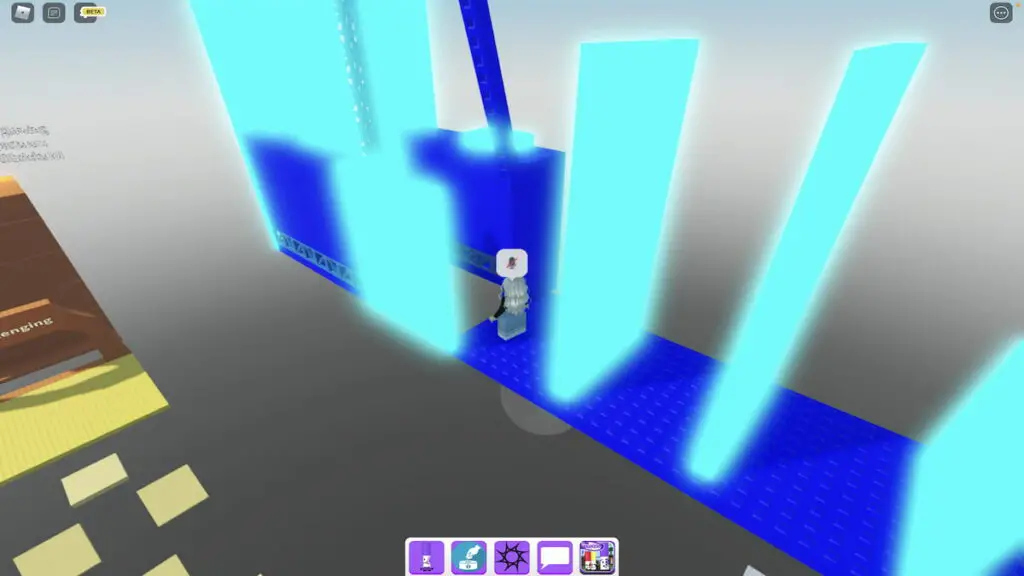
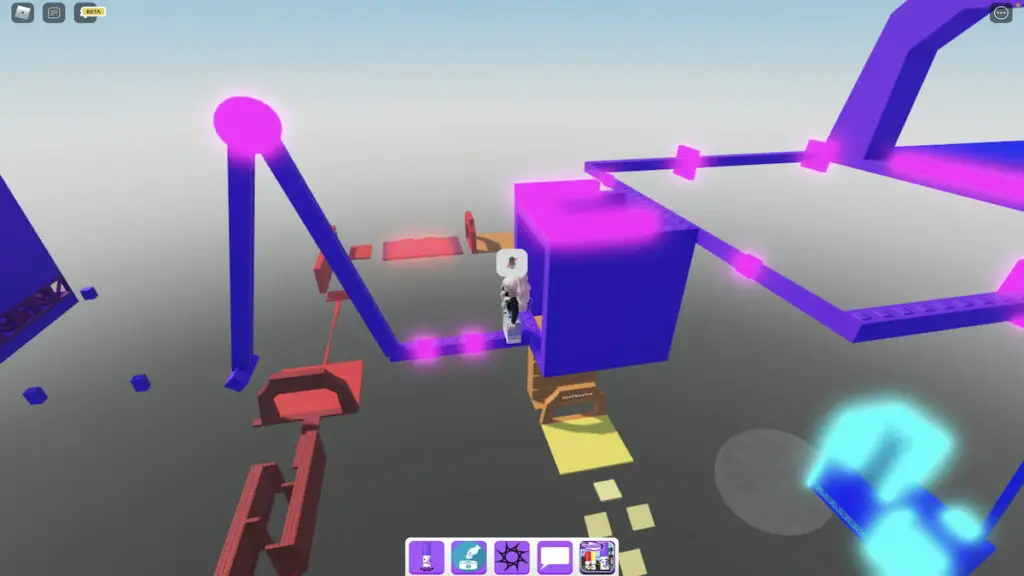
To make it through terrifying, players must avoid a hefty amount of killbricks while jumping, climbing, and stepping in all the right places. To clear the first obstacle, jump around the dark blue blockades and onto the cyan parts of the wall in front of you. Be careful as you jump—if you get too close to the top of the cyan wall, your Robloxian will hit a killbrick and get reset.
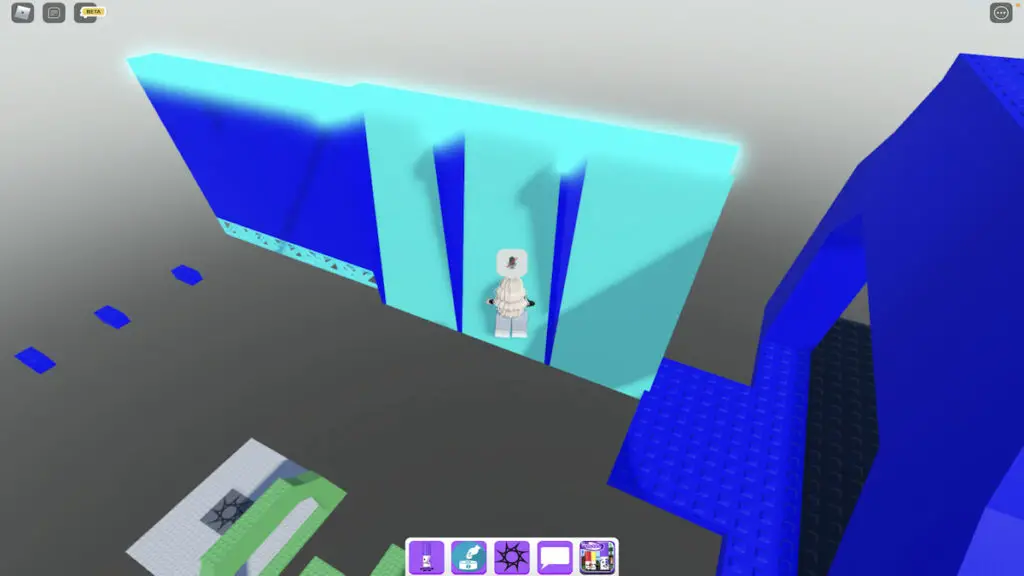
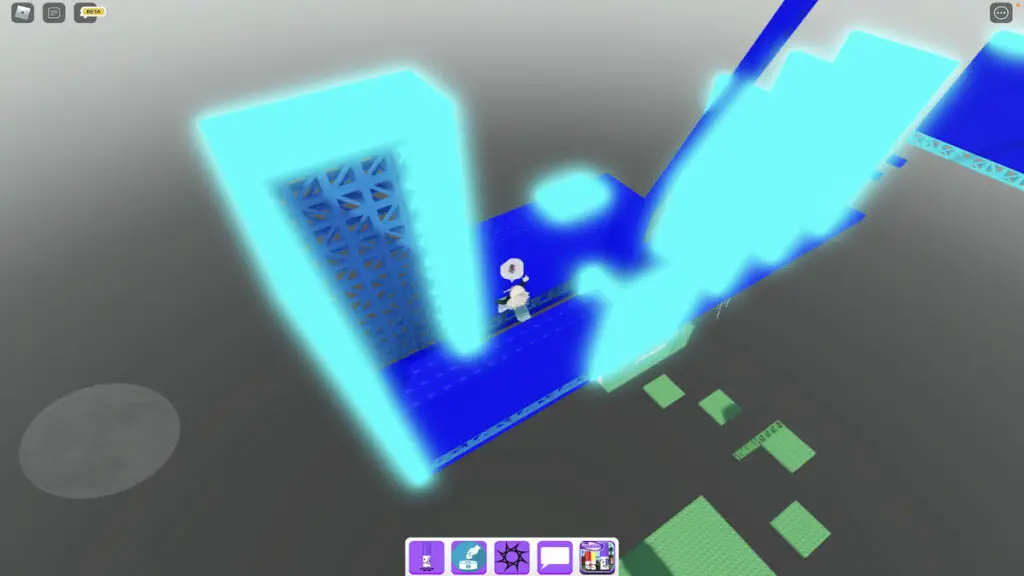
Once you’ve made it to the last cyan wall, carefully jump onto the horizontal ladder to your left and climb to the very end of it. From here, jump backward onto the small platform behind you and continue jumping forward onto the next ones until you reach the large platform.
Related: How to get the Zen Marker in Roblox Find the Markers
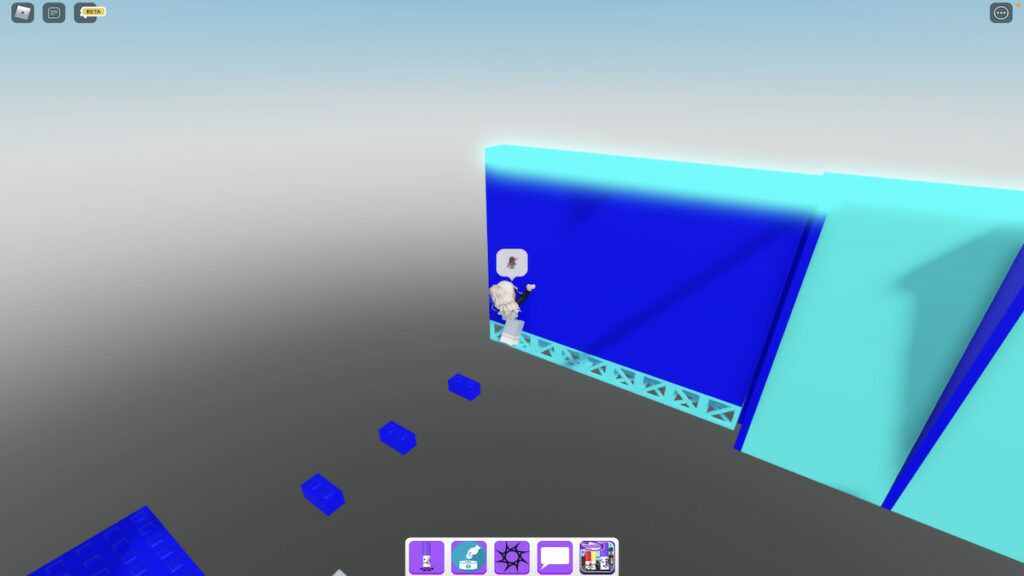
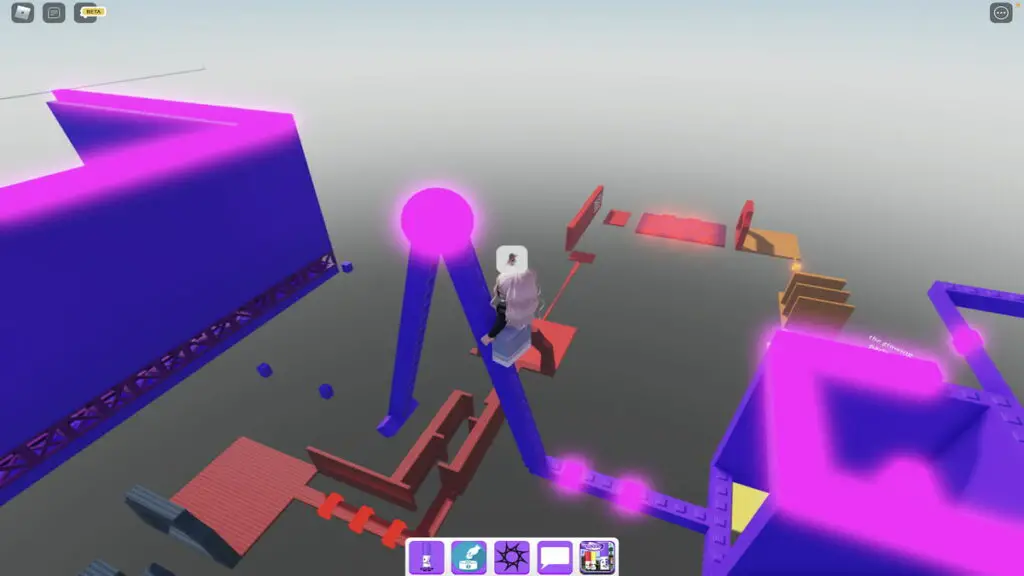
This next obstacle is one that we’ve seen multiple times throughout this obby—jumping out and around blockade walls. The only difference with this obstacle is that the blockades also serve as killbricks, meaning that you will insta die upon touching them. Once you’ve passed these blockades, your next challenge is to repeat the ladder obstacle from the difficult level while avoiding an added twist: more killbricks.
To complete this obstacle successfully, scoot your Robloxian as close to the killbricks as you can without actually touching them—that way, you have more room to turn around and jump from one ladder to the other across the large gap.
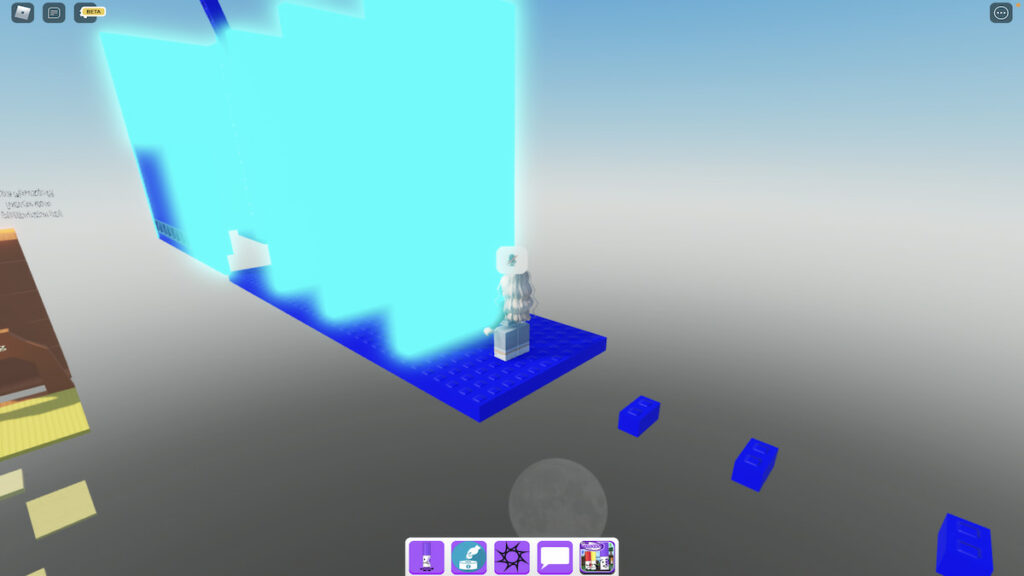
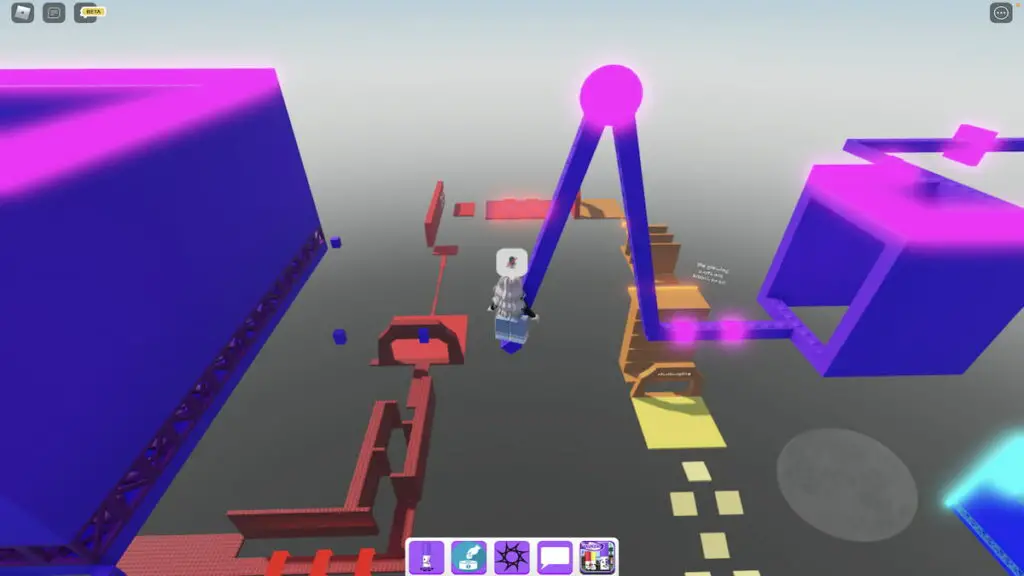
After successfully avoiding these killbricks and climbing across all the horizontal ladders, your Robloxian will need to grab onto and climb a vertical ladder with killbricks surrounding it. To make it off this ladder, jump backward and onto the dark blue platform behind you.
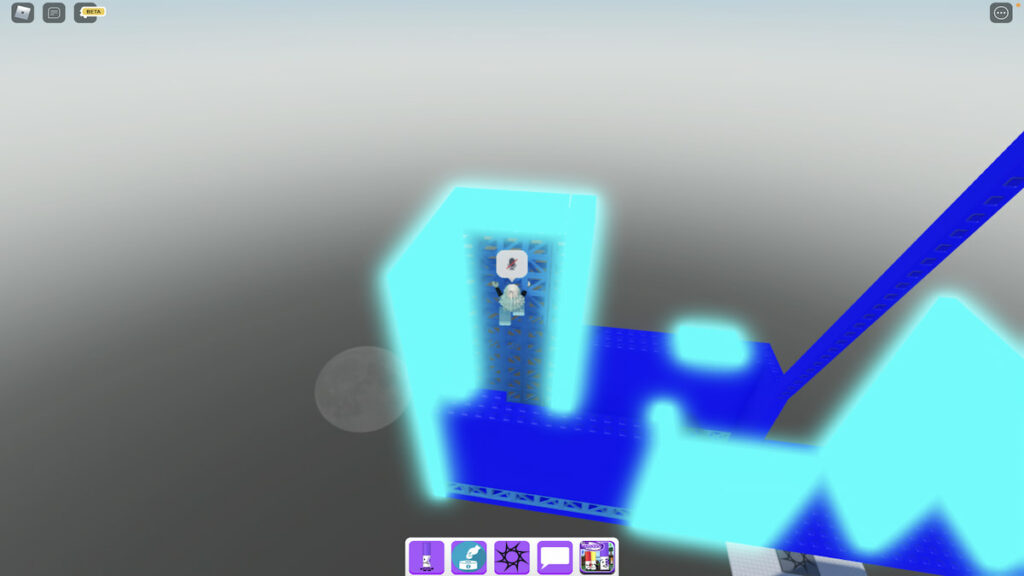
Then, make your way toward the thin, angled platform and climb it carefully.
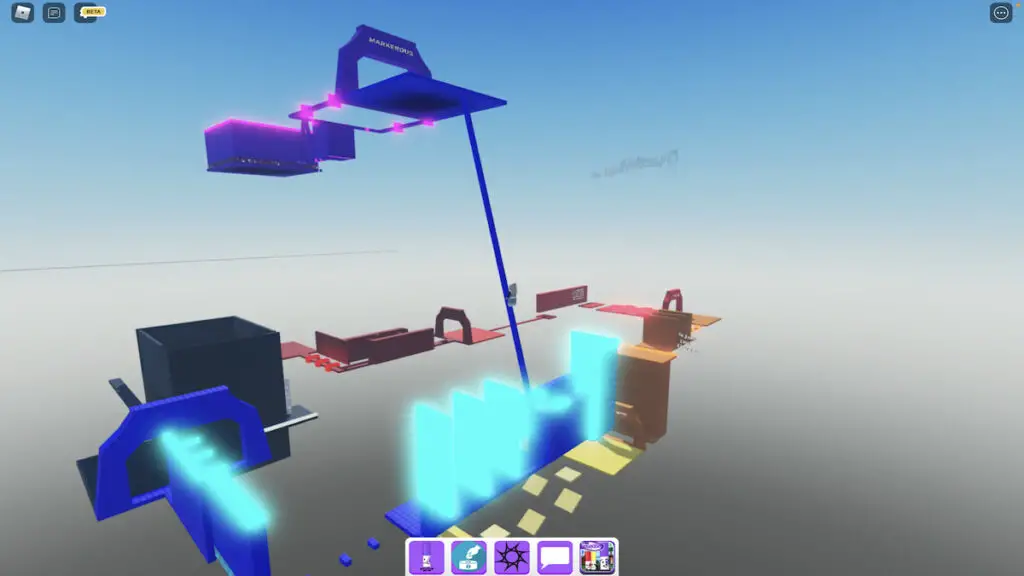
At the top of this platform is the entrance to the final level, MARKEROUS.
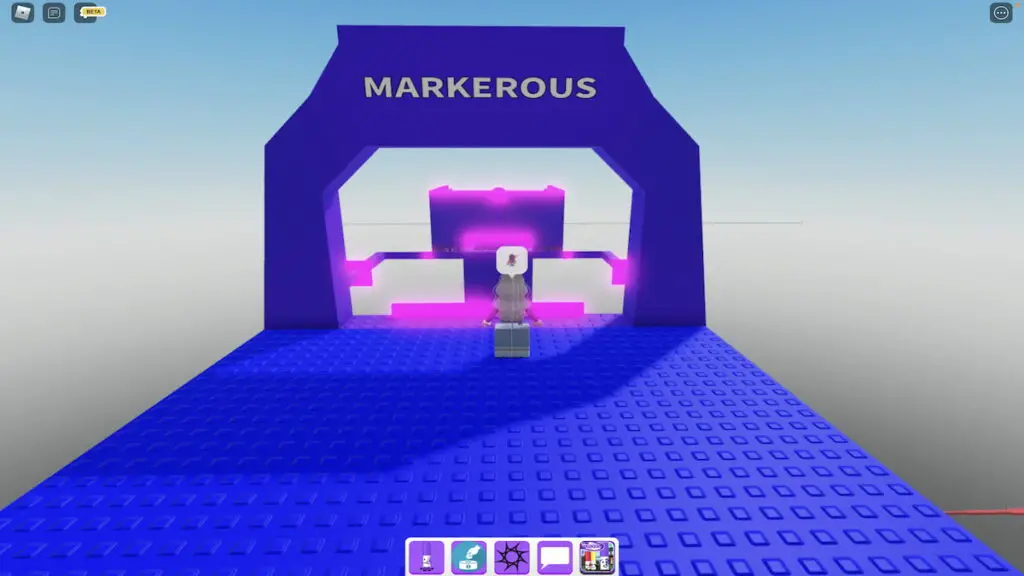
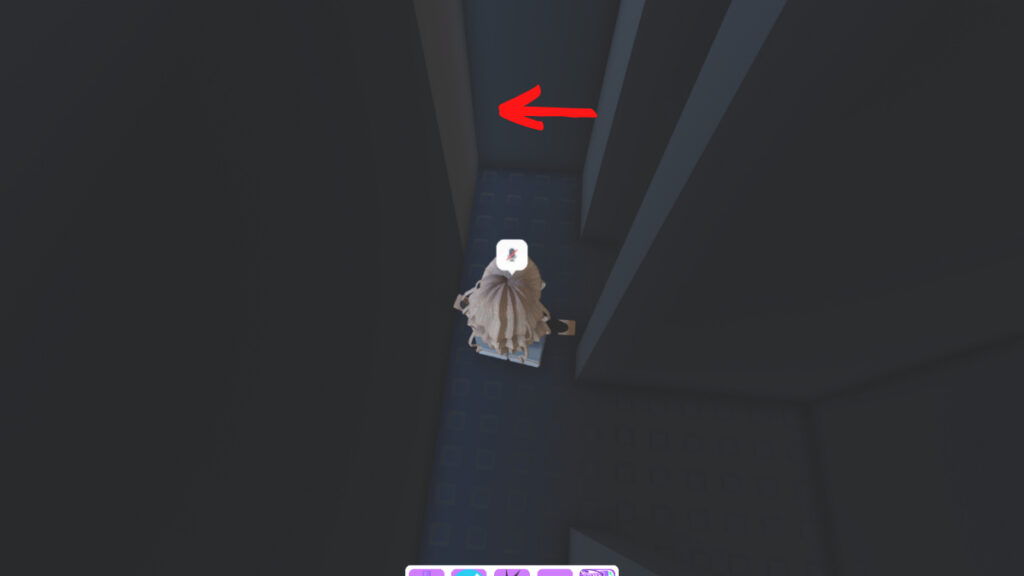
Though this is the Difficulty Dimension’s finale, this level isn’t super difficult in and of itself. While some of the other levels took us over ten tries, MARKEROUS was completed in only two or three. To start, walk to either side of the entrance’s arch, carefully maneuver around the killbrick in front of it, jump to the platform to the side of it, and then walk along the rest of the path to the point below.
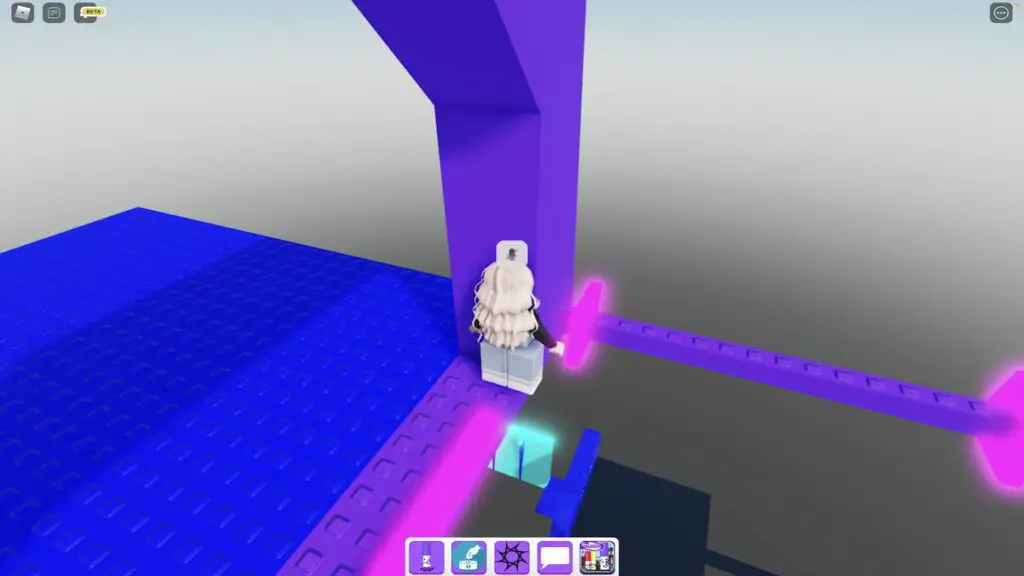
From here, your first instinct is likely to try and jump down onto the platform below—do not do this! Instead, simply walk off the ledge you’re currently standing on. Upon doing so, your avatar will automatically grab onto the platform’s ledge below you, making it easy to walk forward and climb onto it.
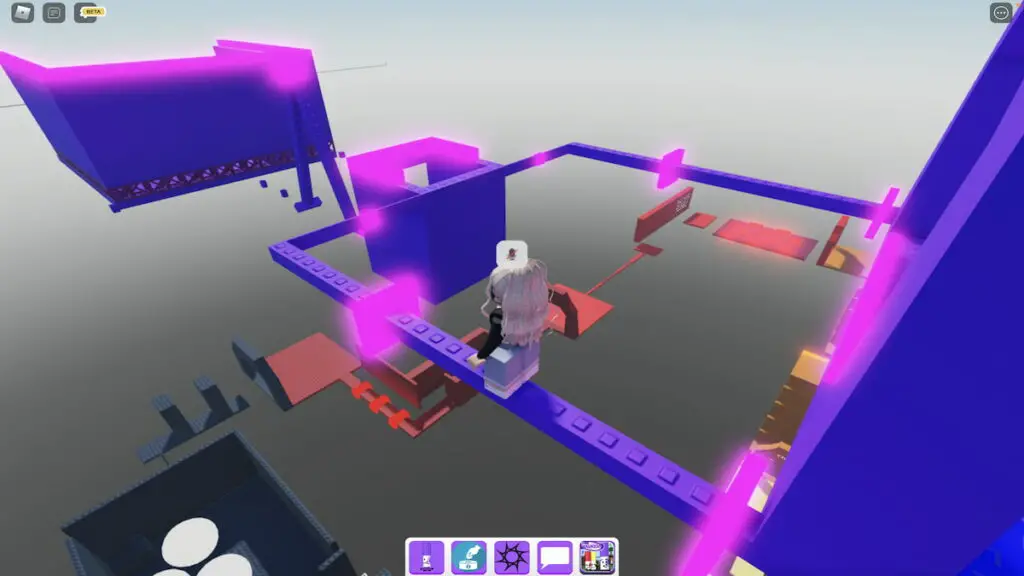
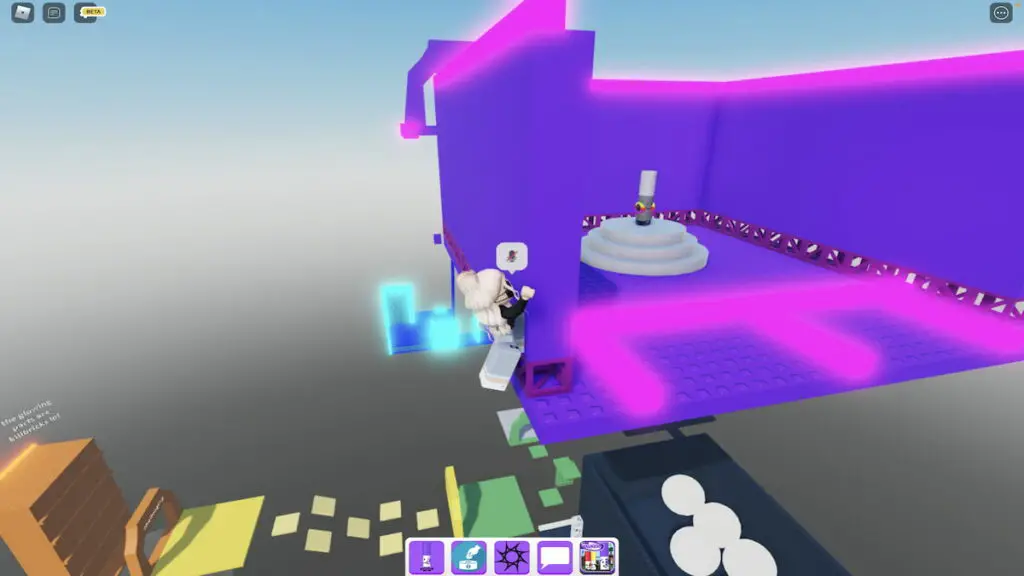
Now, you’ll need to carefully jump between the glowing killbricks and onto the slanted platform.
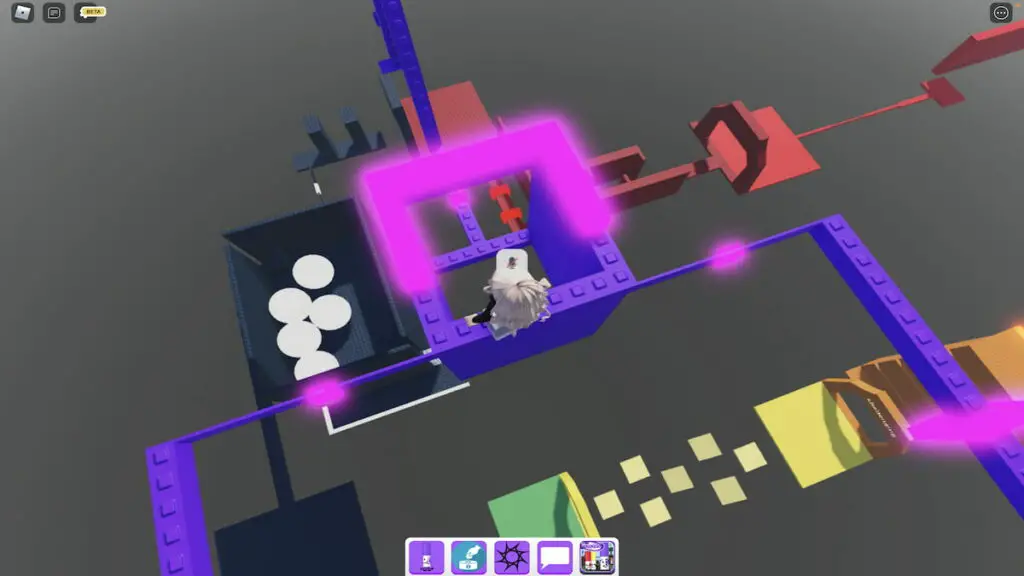
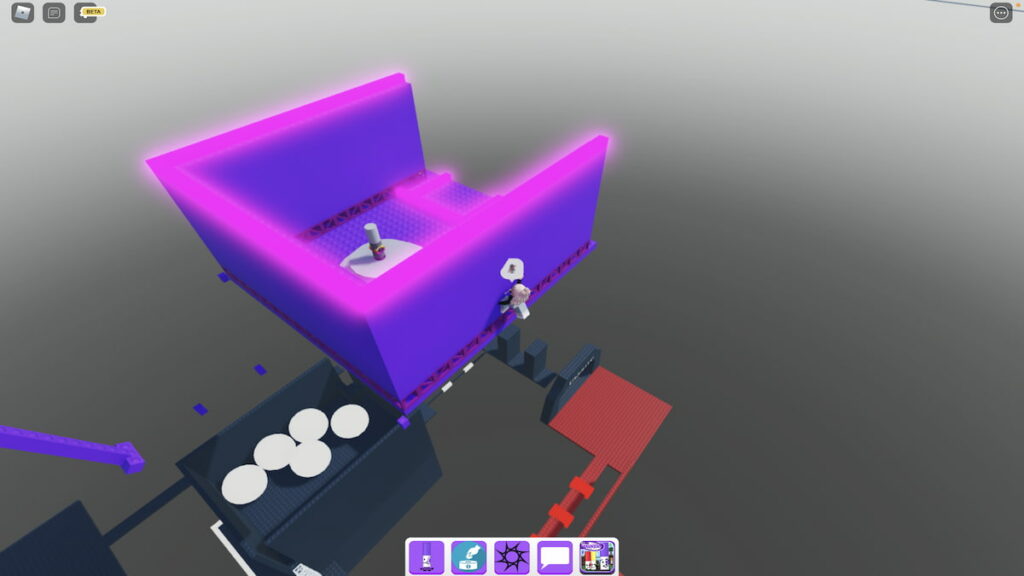
On top of this platform is a spherical killbrick that will insta kill you if you get too close to it. So how do you continue through the MARKEROUS level? You’ll need to jump off this platform, around one of its sides, and onto the small platform at the base.
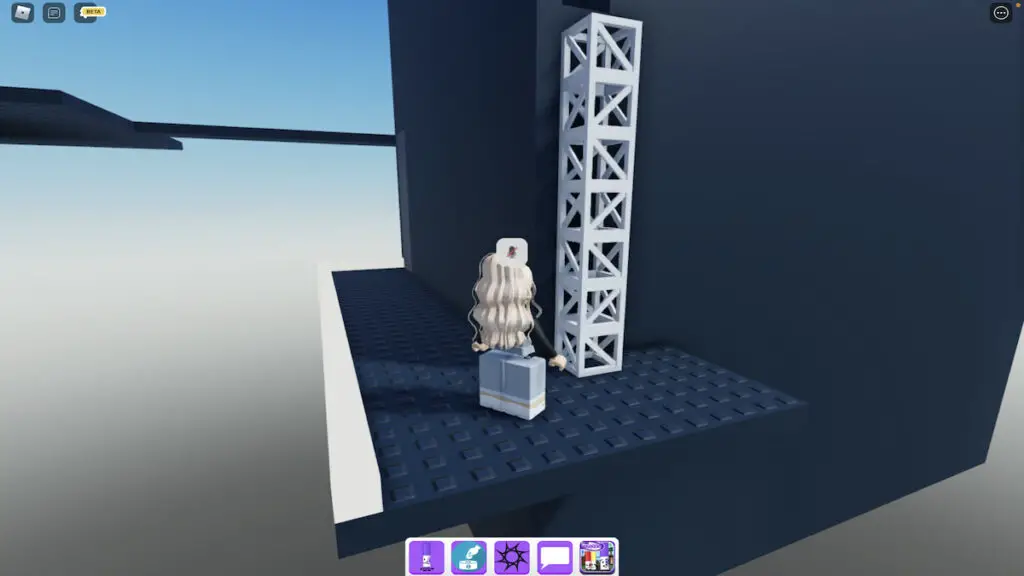
Take a deep breath, you did it! Now, jump onto the minuscule platform pieces in front of you and use them to reach the horizontal ladder. This may seem simple enough, but it can easily become frustrating, so take your time and jump carefully!

Climb this ladder to the right and carefully step onto the edge of the final platform.
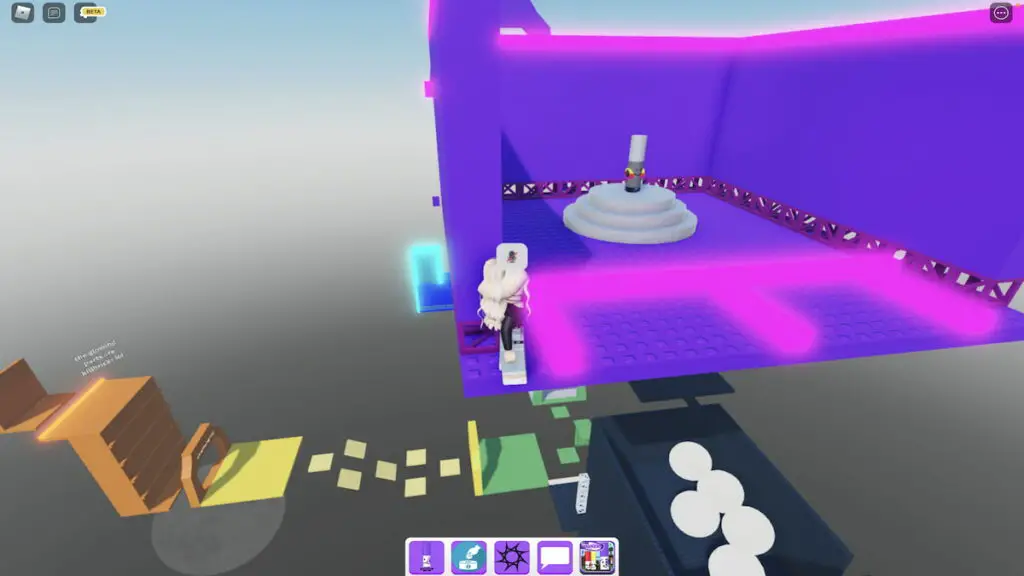
Now, carefully jump toward the Difficulty Chart Marker while avoiding the glowing killbricks. Don’t worry, there’s no last-minute tricks or hidden obstacles in your way!
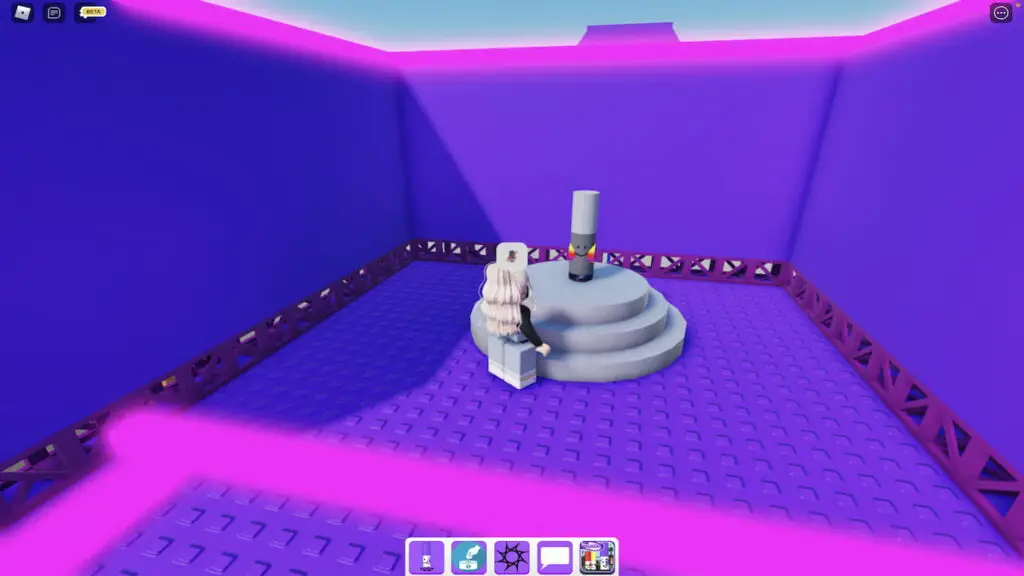
You made it! To add this marker to your Markerdex, simply walk up and touch it. Upon doing so, you should receive the pop up below. Pat yourself on the back—you now own the marker with the hardest difficulty in all of Find the Markers!
Looking for more Find the Markers content? Check out our recent guides on How to get the Atmosphere Marker in Roblox Find the Markers or How to get the Ceramic Marker in Roblox Find the Markers here on Pro Game Guides!